Summary
This article will help when you are away from your normal machine and may need access to files in your research space.
Using Virtual Sites to Access your Research Space:
- What is it? Virtual Sites is a set of computers with our standard software that you can access from off campus.
- Why use it? With Virtual Sites, you can use the software on Campus Computing Sites Windows workstations remotely from any Mac or Windows computer with an internet connection. See:https://its.umich.edu/computing/computers-software/virtual-sites IF YOU HAVE NOT CONNECTED TO THIS SERVICE - BEFORE YOU BEGIN: You can contact the Service Desk to get the needed VMWare Horizon View software by emailing LSATechnologyServices@umich.edu.
Environment
Your local machine.
Directions
Refer to the ITS documentation for details, but:
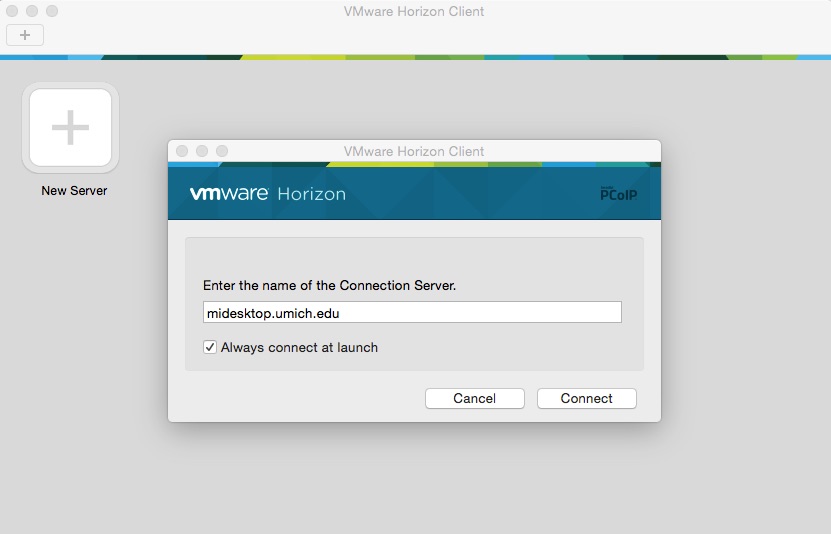
- Run the connection software (VMWare Horizon) and add midesktop.umich.edu as your connection server.
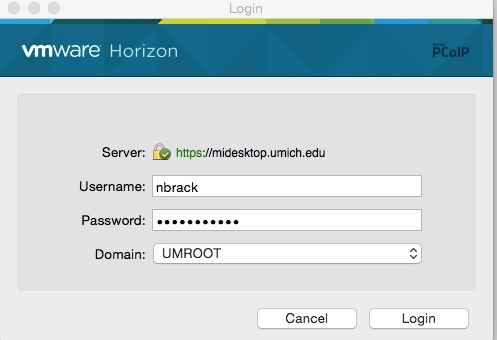
- Enter your uniqname and password. Make sure the selected domain is UMROOT.
- Double click on the Virtual Sites option to begin your connection.

If you are member of a department that already uses this service you may see other connection options. For example, Engineering students have connection choices for Engineering related software. If you have any questions regarding connecting or using the service please contact the ITS Service Center at 764-HELP (734.764.4357).
Get connected to your research file space once you have logged on (S drive, H Drive, or Turbo research storage). If you do not know the path to your storage, please reach out to LSATechnologyServices@umich.edu.
Open My Computer.

- Click on Map a Network Drive.
- Select the drive letter to be used for your mapping.
- Enter the address for your research space.

- Click Finish.

Notes
- The drive mapping does not stay after you have logged out. You will have to re-map each time you log in.
- When opening files that exist, be sure to open them from the drive mapping you set up so that they will save to the same place and you will not lose work.
- When creating new files, be sure to save them to the drive mapping you set up by using the file > save as features of the programs you may use such as word, powerpoint, etc.