Body
Attn: The Michigan Medicine email (lvl2 Outlook account) will be limited to a 2-year retention starting Feb 28th. This means all emails older than 2 years will be deleted from your account. Michigan Medicine advises that you make preparations to backup important emails manually to prevent them from being purged.
What Is The Purpose Of This How-To-Guide?
The purpose of this guide is to provide directions on how to backup all email in a Michigan Medicine Outlook account to Dropbox, in a format that is searchable and retains folder structure and attachments.
Table of Contents
- Read Before You Start
- Step 1
- Step 2
- Step 3 (Skip this step if you do not have a shared mailbox)
- Step 4
- Conclusion
- Get Help
Read Before You Start
This process will heavily rely on the Dropbox Desktop application (not the web site version).
If you do not have the Dropbox app installed be sure to follow these directions to configure it.
- We are recommending that Mac users sign into a School of Nursing WINDOWS laptop in order to proceed with the backup process.
- If you have data that you need to backup, please schedule a time with Nursing IT (Nursing-Help@umich.edu) to begin the process.
- If you are backing up shared mailbox accounts, please allow for extra time during your IT session.
Step 1
*Important Notes:
- This process in total could take several days per the size of your mailbox. We recommend starting ASAP
- This process should take place on your assigned UMSN Workstation (unless you are borrowing one of our loaners because you have an Apple Device)
-
Verify that the DROPBOX app is running on your machine

-
Open Outlook CLASSIC

-
Click FILE

-
Click ACCOUNT SETTINGS

-
Click ACCOUNT SETTINGS again

-
On Email tab, highlight youraccount@med.umich.edu

-
Click CHANGE
-
Move slider all the way to the RIGHT until it says ALL

-
Click NEXT
-
Click DONE

-
CLOSE Outlook and then RESTART Outlook
-
WAIT for Outlook to download all of your email
-
If you see the message ‘UPDATING INBOX’ you must wait. Depending on how much email is being downloaded, this can take awhile. Leave Outlook open while it is downloading stored emails.
-
When you see the message ‘ALL FOLDERS ARE UP TO DATE’ proceed to the next step

Before you proceed any further, please make sure all of your emails are downloaded to your computer!
Emails will begin to download locally to your computer over an extended amount of time as long as you have the Outlook application open.
Depending on the size of your mailbox this could take 1 hour - 3 Days.
The next step will show you how to check the status of the download.
Step 2
-
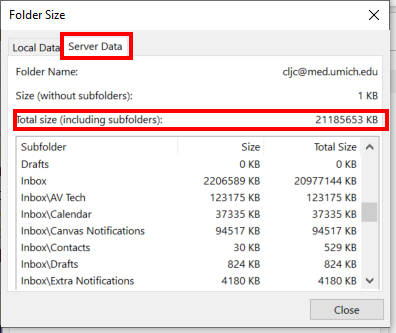
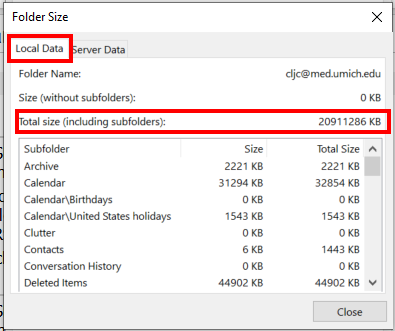
To VERIFY that your mailbox file is fully downloaded prior to exporting it, please do the following within Outlook:
-
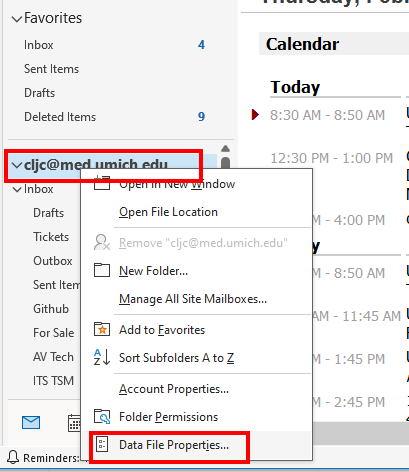
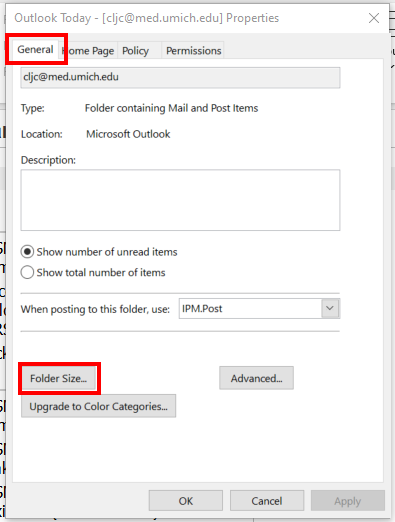
RIGHT CLICK the mailbox you want to verify, and click DATA FILE PROPERTIES
-
Click FILE

-
Click OPEN & EXPORT (On the left menu)

-
Click IMPORT/EXPORT

-
Click/Highlight EXPORT TO A FILE

-
Click NEXT
-
Click/Highlight OUTLOOK DATA FILE (.pst)

-
Click NEXT
-
Click/Highlight youraccount@med.umich.edu
-
Click NEXT
-
Click BROWSE

-
In the browse window, click your NAME under the UNIVERSITY OF MICHIGAN DROPBOX folder (On the left menu)

-
Name the file: " [Your Uniqname] - backup"
-
Click OK
-
Leave ‘REPLACE DUPLICATES WITH ITEMS EXPORTED’ selected.

-
Click FINISH
-
You will be given the option to PASSWORD PROTECT your backup. This is OPTIONAL

Leave Outlook Running until export is completed. This can take an extended period of time based on the amount of data being exported
Step 3 (Skip this step if you do not have a shared mailbox)
-
Verify that the DROPBOX app is running on your machine

-
Open Outlook CLASSIC

-
Click FILE

-
Click OPEN & EXPORT (On the left menu)

-
Click IMPORT/EXPORT

-
Click/Highlight EXPORT TO A FILE

-
Click NEXT
-
Click/Highlight OUTLOOK DATA FILE (.pst)

-
Click NEXT
-
MINIMIZE/COLLAPSE any open Top Level Folders

-
HIGHLIGHT/SELECT the SHARED MAILBOX to export
-
Click NEXT
-
Click BROWSE

-
In the browse window, click your NAME under the UNIVERSITY OF MICHIGAN DROPBOX folder (On the left menu)

-
Name the file
-
Click OK
-
Leave ‘REPLACE DUPLICATES WITH ITEMS EXPORTED’ selected
-
Click FINISH

-
You will be given the option to PASSWORD PROTECT your backup. This is OPTIONAL
Step 4
-
Verify that the DROPBOX app is running on your machine

-
Open Outlook CLASSIC

-
Click FILE

-
Click OPEN & EXPORT (On the left menu)

-
Click OPEN OUTLOOK DATA FILE

-
In the browse window, click your NAME under the UNIVERSITY OF MICHIGAN DROPBOX folder (On the left menu - Assuming file is saved here)

-
SELECT the file
-
Click OK
- VERIFY the Data File is visible within Outlook

Conclusion
- VERIFY the Data File is visible within Outlook

- EXPAND the Data File

- Example of Emails From Restored PST

If you have any issues during this process please send us an email or give us a call:
UMSN-IT